How Long Is Your Railway?
Garden Railways Magazine
December 2005
The notes below are meant to supplement the article "How Long Is
Your Railway?" that was published in Garden Railways Magazine, December 2005.
That article describes a method of determining the length of track in railway by
using a modified calculator.
The notes below give modification details for calculators other
than those in the article. If you have tried other calculators and wish to
share your experiences, both successes and failures, please email me at
dave@davebodnar.com and I will add your
information below. Be sure to include as much of what I have below and any
pictures that you have.
Thanks!
dave


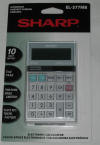
- Sharp Elsimate EL-377M
- Very easy modification!
- Large display - 10 digits
- Purchased at Target 7-30-2005
- Item EL-377BM
- Barcode 074000016866
- Price $5.99
- Disassembly:
- Remove 4 screws from the back of the case
- Gently separate the two sections of the case with a small flat bladed
screwdriver (note that it can be difficult to separate them)
- Locate the two pads in the photo – one is just below the “K5” label and one
is about 1/8” to the right of the “K8” label
- Solder wires to these two pads and route the wires out of the case
- Reassemble
- Test by entering 1+=== and touching the ends of the wires together
- Auto off in 6 to 7 minutes
-


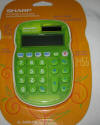
- Sharp Elsimate EL-S20
- Moderately easy modification
- Very LARGE display
- Purchased at Target 7-30-2005
- EL-320B-GR
- Barcode 074000018075
- Price $4.99
- Disassembly:
- Remove 6 screws from the back of the case
- Gently separate the two sections of the case
- Locate the two pads in the photo
- One is just to the right of the last number “2” at the end of
the number “420F0ELS0R2PP-2” that is painted in the lower right
corner of the circuit board - in the photo a white wire is soldered
to it
- The other pad is in the left center of the circuit board 5/8” to
the right of the board edge and 1.5” above the bottom edge -
in the photo a blue wire is soldered to it
- Solder wires to these two pads and route the wires out of the case
- Reassemble
- Test by entering 1+=== and touching the ends of the wires together
- Auto off in 6 to 7 minutes


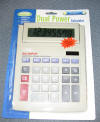
- LeWORLD Big Display
- More difficult modification
- Very, Very LARGE display
- Purchased at Wal-Mart 8-1-2005
- no specific model number
- Barcode 728546035002
- Price $2.96
- Disassembly:
- Remove 9 screws from the back of the case - do not remove the 4
screws on the back of the display
- Gently separate the two sections of the case - take care not to
allow the keys to fall out as they are only held in by the thin
backing material
- Locate the two traces in the photo
- one is all the way to the right - in the photo a blue wire is
soldered to it
- the other is the 7th from the right - in the photo a white wire
is soldered to it
- These traces are covered with green paint that must be GENTLY
removed by scraping. Take care not to scrape through the
entire trace, just enough so that the copper metal is exposed.
- Solder wires to these two pads and route the wires out of the case.
Keep the soldering iron away from the plastic cable that connects
the circuit board and the keypad.
- Reassemble
- Test by entering 1+=== and touching the ends of the wires together
- Auto off in 6 to 7 minutes
-


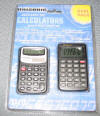
- Unisonic Dual Pack (two calculators)
- One very easy - the other not practical
- Small display
- Purchased at Wal-Mart 8-1-2005
- Model DP410
- Barcode 020426658517
- Price $4.97
- Note that there are two calculators in this pack - the solar powered
unit (single screw in the back) is easy to modify. The other (4
screws in back) is not practical to modify as there are no solder pads
on the back of the unit.
- Disassembly:
- Remove the single screw from the back of the unit
- Gently separate the two sections of the case with a small
screwdriver
- Locate the two solder pads in the photo
- One is above and to the left of the battery - in the photo a
blue wire is soldered to it
- The other is just to the right of the battery - in the photo a
white wire is soldered to it
- Solder wires to these two pads and route the wires out of the case.
- Reassemble
- Test by entering 1+=== and touching the ends of the wires together
- Auto off in 6 to 7 minutes

